|

|
 |
Baslogue ®
|
|
STUDENT DIALOG
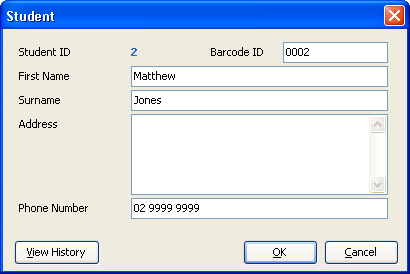
The student dialog
is where you enter details about a student. You get to this
dialog
by either selecting New Student,
Edit Student or View Student from the Students Tab on the main screen
You can customise the fields which appear on this dialog, and the
captions for each field. See the Columns
Used
for People tab within the Display Options dialog for
further information. The following fields, and those shown in the
screenshot above, are the fields which are available by default:
- Student ID - is automatically
generated when a new record is created, and cannot be changed
- Barcode ID - defaults to the ID of the
student, but can be changed to any value. This is the value
encoded into the barcode on a student card.
- First Name - enter the first name of
the student.
- Surname - enter the surname of the student.
- Address - enter the address of the student (optional)
- Phone Number - enter the phone
number of the student (optional)
- View History - this allows you to
view the history for this student - i.e. when items were
loaned out,
returned, etc... See Student
History
for further information.
- View Picture (not shown by default)
- when the "picture" column is enabled in the Display
Options dialog a button will be shown next to the View History button. Clicking
on this button will bring up a new dialog. A JPEG image can be
loaded from a file using this dialog and stored against the
student. Storing of large
size images against many student records may severely reduce
performance in Baslogue.
It is recommended that you make the image files as small as
possible.
Also, be aware that the Database Edition of Baslogue will handle a
large number of images more efficiently than the Standalone Edition.
Related Topics
Return
to
the
welcome page
or Go to the Baslogue Home Page
|
Copyright
©
2009
Petrie
Software
Pty
Ltd (A.C.N. 110 519 723)
|