|

|
 |
Baslogue ®
|
|
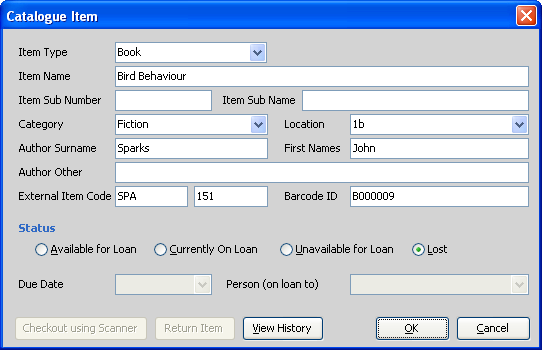
CATALOGUE ITEM DIALOG
The Catalogue Item
dialog is one of the main dialogs within Baslogue®. This is where
you define everything to do with an item - its name, author, status,
etc... You get to this dialog by selecting New Item, Edit Item or View Item from the Catalogue Tab on the main screen.
NOTE: The columns (fields) available for a catalogue
item can be customised using the Display
Options dialog. Therefore, the fields that you see below may
be different to what appears for you. Please refer to the Display
Options dialog for further information.
The colour of the
dialog changes depending on the status of the item:
- Available for Loan.
This
means the item is available to be taken out on loan.
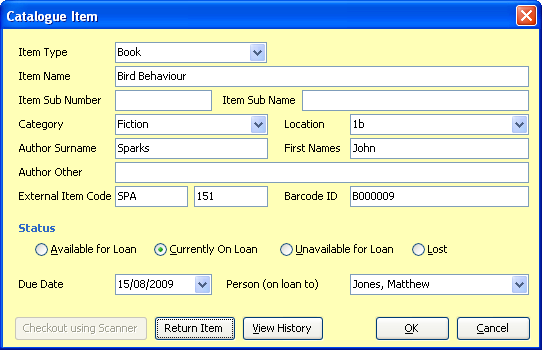
- Currently On Loan.
This
means that the item is currently on loan
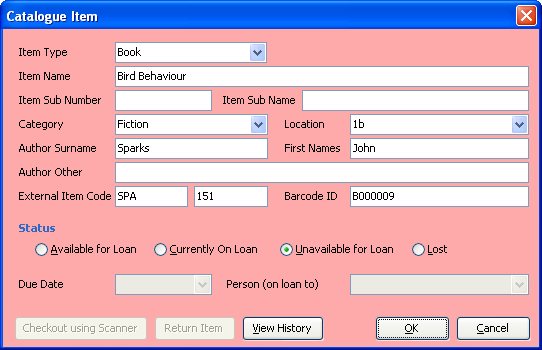
- Unavailable for Loan.
This
means that for some administrative reason the item is not
currently available to be loaned out.
- Lost.
This
means that the item has been lost.
When an item is Available for Loan,
it
looks like this:
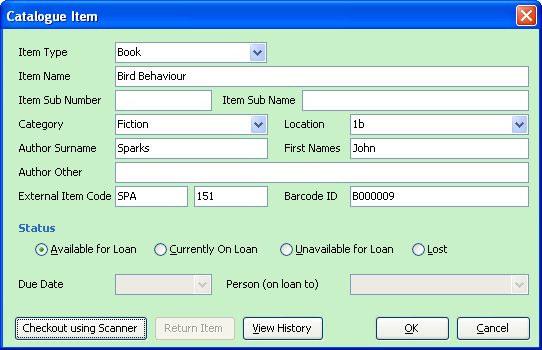
- Item Type - you can type in anything
you like here. Previously used values appear in the drop-down
list, but this field will accept any new value. This field can be left
empty.
- Item Name - type in the name of your
item here. The Item Name does not
have to be unique. You may differentiate between items
by using one of the other fields, if needed.
- Item Sub Number - a further way if
identifying your item. For example, "Disc 1". This field
can be left empty.
- Item Sub Name - yet another way if
identifying or distinguishing items. Enter whatever you like, or
leave it empty.
- Category - if you want to categorise
your items, enter a category here. Previously used values
appear in the drop-down list, but this field will accept any new
value. This
field
can be left empty.
- Location - intended to record where
the item is physically shelved. Enter whatever value you
like. Previously
used
values appear in the drop-down list, but this field will accept
any new value. This field can be left empty.
- Author Surname - enter the surname
of the author, if the item has one. This field can be left
empty.
- Author First Names - enter the first
names of the author, if the item has any. This field can be left
empty.
- Author Other - enter other types of
author information here - for example if the author is not a person but
is actually a company or group. This field can be left
empty.
- External Item Code - If there is a
secondary cataloguing system that you would like to use, you may enter
its number system here. For example, you may like to enter the
Dewey Decimal number. This field can be left
empty.
- Barcode ID - Enter the Barcode ID of
the item here, if you are using barcodes. This field can be
left empty.
TIP FOR ENTERING BARCODE ---
If you have already put a barcode label on the item, then instead of
typing in the Barcode ID using the keyboard you can click into the
Barcode ID field and then scan the barcode using the barcode
scanner. This will put the Barcode ID into the Barcode ID field
and then immediately save and close the dialog. So it is
recommended that you do this as the last piece of data to enter into
the dialog, otherwise you will have to open it up again.
- Status - select the desired status
(see above for list of statuses).
- Due Date - this is only active when
the status is "Currently on Loan" (see below). Select the date
when this item is due to be returned.
- Person (on loan to) - this is only active when
the status is "Currently on Loan" (see below). Select the person who
is
taking the item out on loan.
- Checkout using Scanner - this is only active when
the status is "Available for Loan". Click this button to check
out an item by scanning a person's card while you are in this
screen. You will get a dialog box like this:
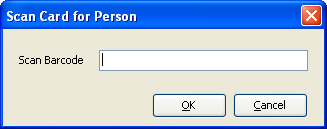
Scan the person's barcode, and you will be returned to the item
dialog screen with the status changed to "Currently on Loan" and the
Due Date and Person fields set appropriately.
- Return Item - this is only active when
the status is "Currently on Loan" (see below). Clicking this
button will set the status back to "Available for Loan" and clear the
Due Date and Person fields. This button does exactly the same
thing as manually selecting the "Available for Loan" status.
- View History - this allows you to
view the history for this item - i.e. when items were loaned out,
returned, etc... See Item History
for further information.
Below are examples
of how the dialog looks in its other states:
Currently on Loan
Unavailable for Loan
Lost
Related Topics
Return
to the welcome page or Go to the Baslogue Home Page
|
Copyright
©
2009 Petrie Software Pty Ltd (A.C.N. 110 519 723)
|